一、引入
在分享如何调用OpenAI开放的API前,首先来简答梳理一下几个基本概念:OpenAI、GPT3.5、ChatGPT、API。
OpenAI:根据维基百科定义,OpenAI指开放人工智能研究中心,是一个美国人工智能研究实验室,由非营利组织OpenAI Inc,和其营利组织子公司OpenAI LP所组成。
ChatGPT:OpenAI开发的人工智能聊天机器人应用,于2022年11月推出。ChatGPT基于GPT-3.5、GPT-4模型架构,是专门设计用来完成会话任务的GPT模型。因此,ChatGPT具有两层内涵,既指聊天应用,也指代语言模型。
GPT3.5:从技术升级角度对GPT模型的命名。
| 名称 | 发布时间 | 参数量(亿) |
|---|---|---|
| GPT | 2018 | 1.17 |
| GPT-2 | 2019 | 15 |
| GPT-3 | 2020 | 1750 |
| GPT-3.5 | 2022 | 1750* |
*GPT-3.5是基于GPT-3进行指令调优和RLHF调优来的(GPT3是目前唯一支持微调的模型),参数数量估计和GPT-3一样,也是1750亿。根据官方文档,GPT-3.5-Turbo经过了蒸馏或shrink,实际参数可能也就十几亿(所以才会又快又便宜)。
GPT-3.5系列模型中包含了Ada模型、Babbage模型、Curie模型、Davinci模型和Turbo模型。前四者是四个不同规模和能力的语言模型,具体详见 官方文档 ,使用时可根据应用场景选择。
API :应用程序接口(Application Programming Interface,简称:API)。API可以连接两个独立程序,实现数据传输,减少技术人员的重复性工作。
举个例子,研发人员A开发了软件A,研发人员B正在研发软件B。有一天,研发人员B想要调用软件A的部分功能来用,但是他又不想从头看一遍软件A的源码和功能实现过程,怎么办呢?研发人员A想了一个好主意:我把软件A里你需要的功能打包好,写成一个函数;你按照我说的流程,把这个函数放在软件B里,就能直接用我的功能了!

同理,如果我们想要给自己开发的应用增加一个GPT3.5模型的对话功能,可以直接使用OpenAI提供的API接口,无需本地部署一个GPT3.5(也不现实)。
二、OpenAI开放的API接口简介
根据官方文档 API Reference 中的介绍,目前提供10个大类的API接口,具体如下:
| 序号 | API名称 | 描述 |
|---|---|---|
| 1 | Models | 查看所用API Key的具体信息,如可用模型,所属组织等。 |
| 2 | Chat | 预设系统角色,并在特定场景下与用户进行对话 |
| 3 | Completions | 根据给定Prompt和参数,返回一个或多个结果 |
| 4 | Images | 根据给定的Prompt和参数生成图片,或对用户提供的图片进行编辑、生成图像变体 |
| 5 | Embeddings | 将输入的文本通过embedding向量化 |
| 6 | Audio | 将输入的音频转为对应语言的文字或翻译为英语 |
| 7 | Files | 上传用于微调模型等操作的文件 |
| 8 | Fine-tunes | 使用上传的文件对模型进行微调操作 |
| 9 | Moderations | 判断输入文本是否违反OpenAI的条款,如果违反输出违反的具体类型 |
| 10 | Edits | 根据输入文本和prompt,对文本进行调整 |
三、使用PHP调用OpenAI开放的API
OpenAI官方文档中给出了三种API调用方式,分别是cURL、Python和Node.js。cURL是一个用来请求Web服务器的命令行工具,可以将其简单类比为模拟人通过浏览器访问网页获取数据。本教程中我们使用cURL,将其转为PHP然后调用API。这里我们以Completion为例,具体调用步骤如下:
1. 将cURL转为PHP
这里我们推荐使用curl-to-php网站对官方提供的代码进行转换:http://incarnate.github.io/curl-to-php/
官方提供的API调用代码:
curl https://api.openai.com/v1/completions \
  -H "Content-Type: application/json" \
  -H "Authorization: Bearer $OPENAI_API_KEY" \
  -d '{
    "model": "text-davinci-003",
    "prompt": "Say this is a test",
    "max_tokens": 7,
    "temperature": 0
  }'
转换后的PHP代码为
<?php
// Generated by curl-to-PHP: http://incarnate.github.io/curl-to-php/
$ch = curl_init();

curl_setopt($ch, CURLOPT_URL, 'https://api.openai.com/v1/completions');
curl_setopt($ch, CURLOPT_RETURNTRANSFER, 1);
curl_setopt($ch, CURLOPT_POST, 1);
curl_setopt($ch, CURLOPT_POSTFIELDS, "{\n    \"model\": \"text-davinci-003\",\n    \"prompt\": \"Say this is a test\",\n    \"max_tokens\": 7,\n    \"temperature\": 0\n  }");

$headers = array();
$headers[] = 'Content-Type: application/json';
$headers[] = 'Authorization: _ENV["Bearer OPENAI_API_KEY"];
curl_setopt($ch, CURLOPT_HTTPHEADER, $headers);

$result = curl_exec($ch);
if (curl_errno($ch)) {
    echo 'Error:' . curl_error($ch);
}
curl_close($ch);
?>
2. 调整转换后的PHP代码
(1)由于官方提供的API网址在国内无法访问,因此需要对官方网址进行反代,操作步骤如下。
将 https://api.openai.com 替换为 https://fandai.wanglin.blog ;
#官方API网址
curl https://api.openai.com/v1/completions \

#反代官方API网址
curl https://fandai.wanglin.blog/v1/completions \反代网址配置方式可参考这篇文章:https://wanglin.blog/index.php/archives/62/
(2)添加自己的API Key
#源代码
$headers[] = 'Authorization: _ENV["Bearer OPENAI_API_KEY"];
#替换后的代码
$headers[] = "Authorization: Bearer "."sk-****";
(3)在 curl_setopt($ch, CURLOPT_HTTPHEADER, $headers); 下添加下面两行代码,禁用SSL证书验证。
#使用cURL发送HTTPS请求时禁用SSL证书验证
curl_setopt($ch, CURLOPT_SSL_VERIFYHOST, 0);
curl_setopt($ch, CURLOPT_SSL_VERIFYPEER, 0);
(4)在最后一行添加下面两行代码,将API返回结果全部输出
$result = json_decode($result);
var_dump($result);
最终的完整代码如下:
<?php

$ch = curl_init();

curl_setopt($ch, CURLOPT_URL, 'https://fandai.wanglin.blog/v1/chat/completions');
curl_setopt($ch, CURLOPT_RETURNTRANSFER, 1);
curl_setopt($ch, CURLOPT_POST, 1);
curl_setopt($ch, CURLOPT_POSTFIELDS, "{
    \"model\": \"gpt-3.5-turbo\",
    \"messages\": [{\"role\": \"user\", \"content\": \"What is the OpenAI mission?\"}]
}");

$headers = array();
$headers[] = "Authorization: Bearer "."sk-***";
$headers[] = 'Content-Type: application/json';
curl_setopt($ch, CURLOPT_HTTPHEADER, $headers);
curl_setopt($ch, CURLOPT_SSL_VERIFYHOST, 0);
curl_setopt($ch, CURLOPT_SSL_VERIFYPEER, 0);

$result = curl_exec($ch);
if (curl_errno($ch)) {
    echo 'Error:' . curl_error($ch);
}
curl_close($ch);

$result = json_decode($result);
var_dump($result);
?>
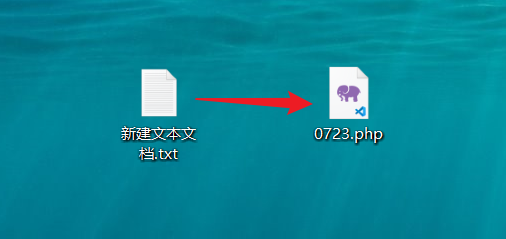
将上述代码保存到txt文件中,命名为0723,后缀名.txt修改为.php(推荐下载VSCode进行编辑)。
3. 配置环境。
请注意,不要将PhpStudy安装到C盘!具体安装配置教程可参考下列视频:
https://www.bilibili.com/video/BV1Lr4y1k7yQ?p=2
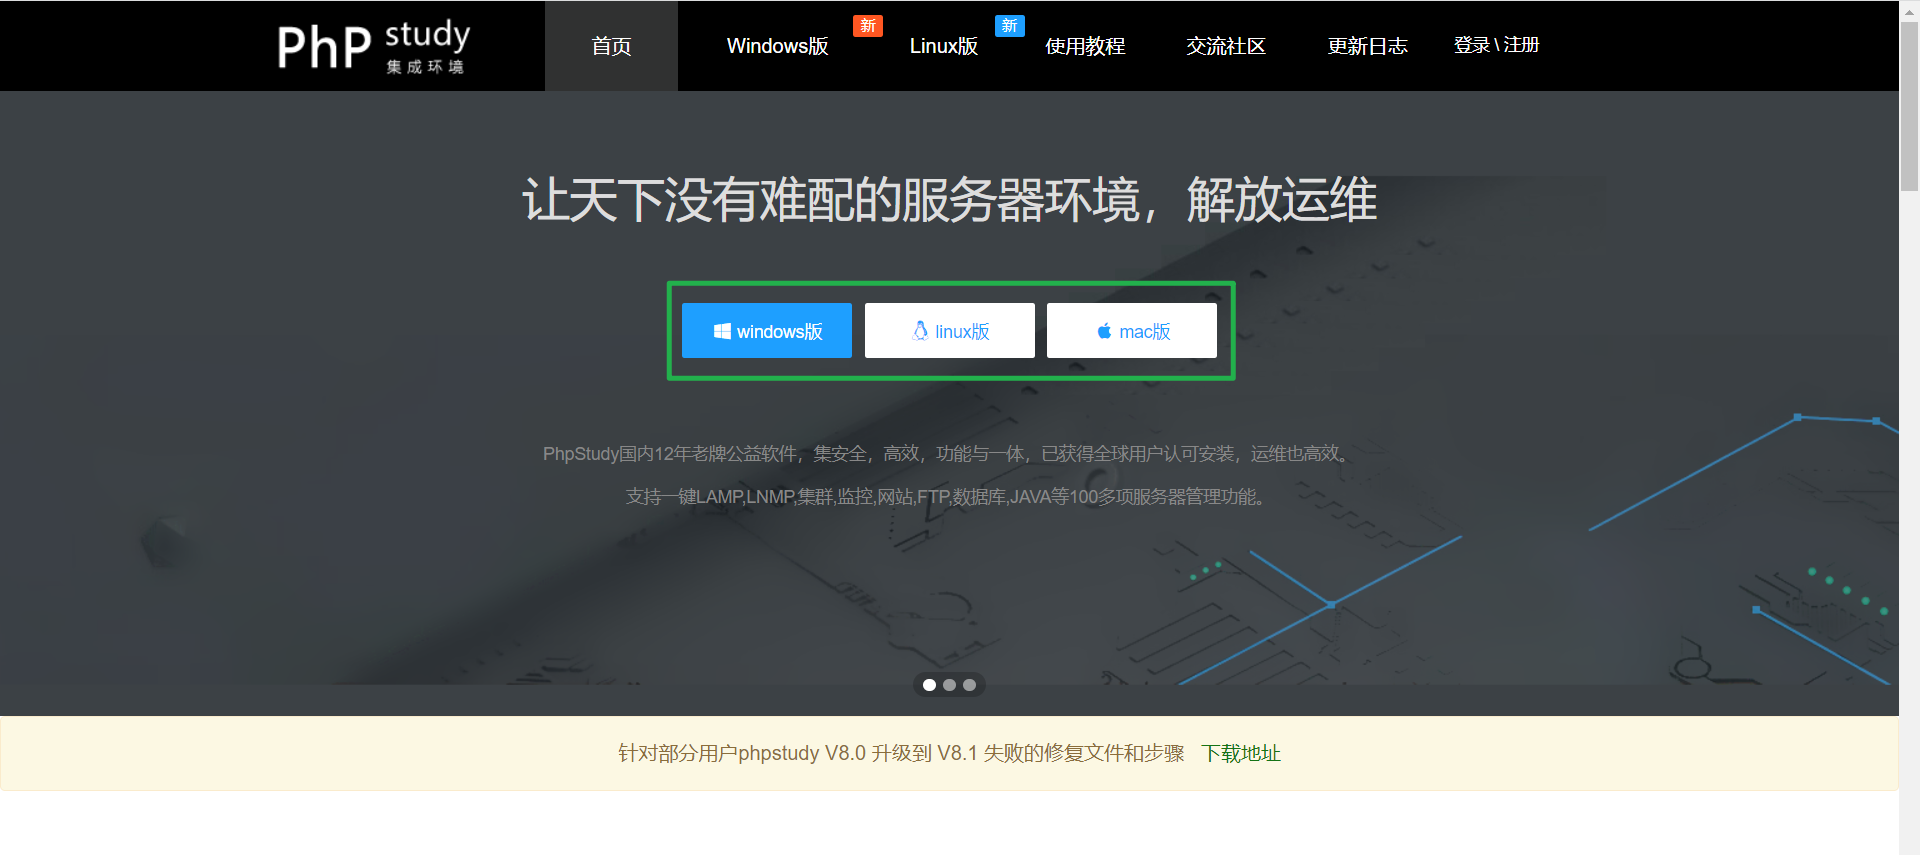
- 据自己的电脑系统,下载对应版本的 PhpStudy :https://www.xp.cn/
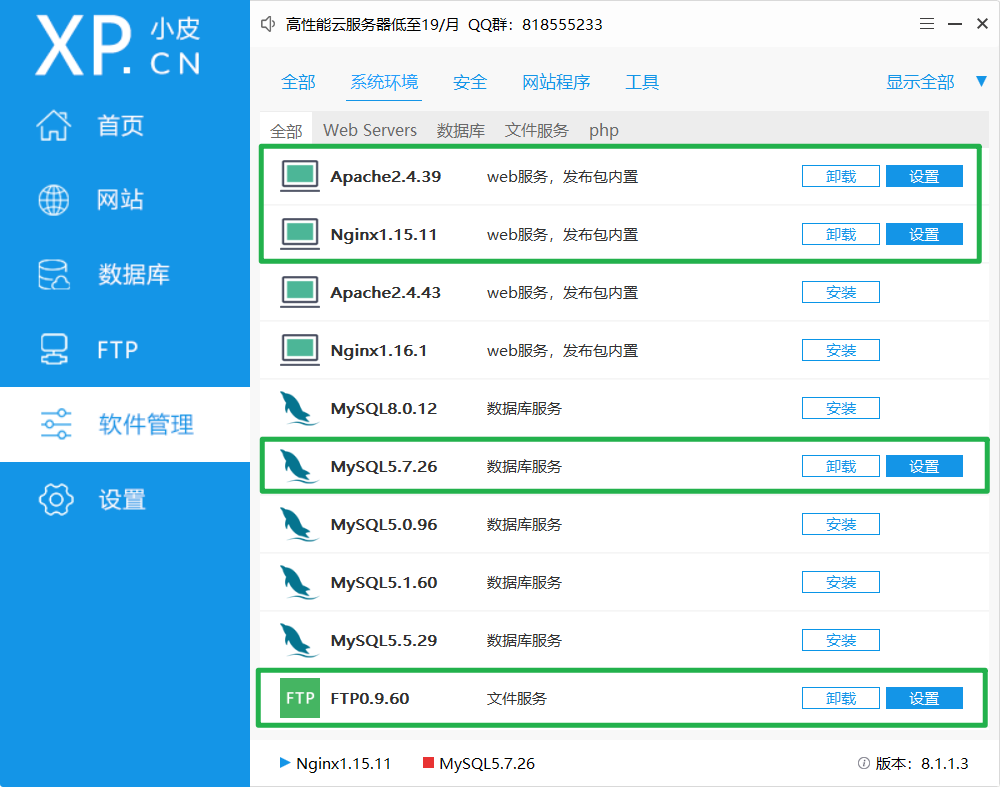
- 在软件管理界面安装对应工具。
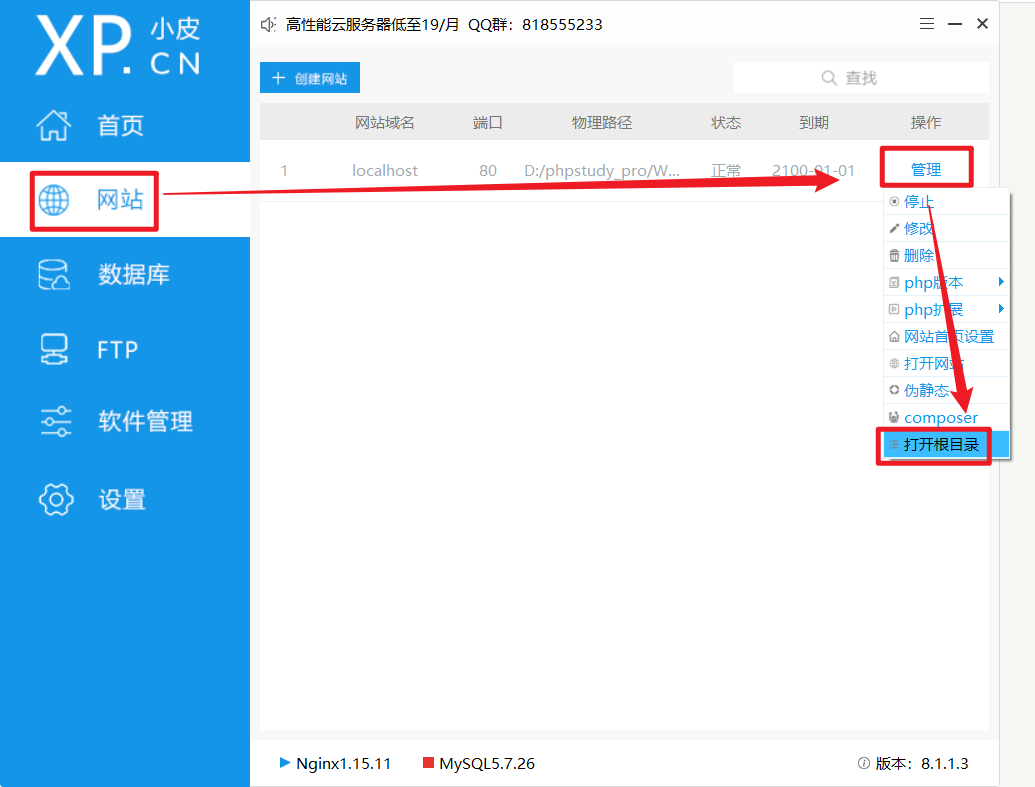
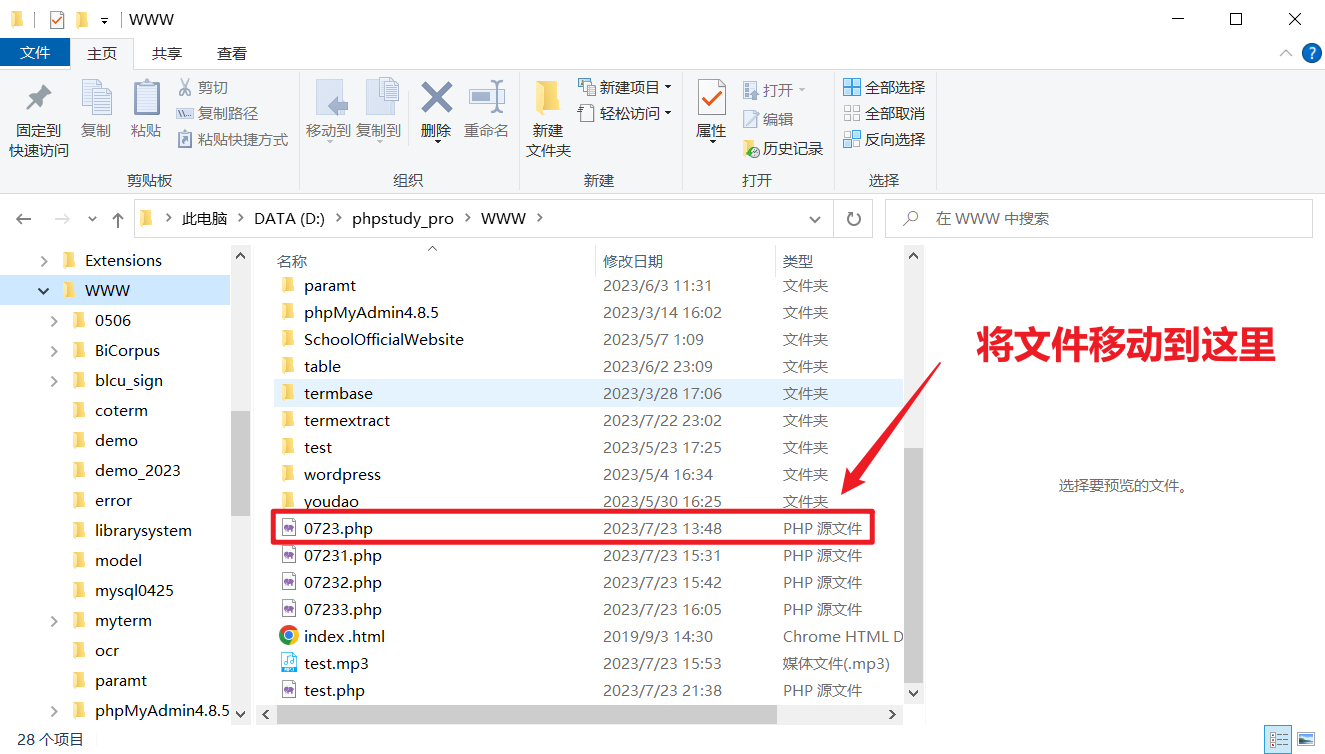
- 打开网站->管理->根目录,将php文件移动到WWW文件夹下
- 网页访问:localhost/0723.php

页面返回结果如下,其中包含了我们需要的结果和其他内容。
5.将我们的php代码和页面返回的结果复制,让ChatGPT帮我们调整代码。
请根据回复的内容调整php代码,只输出结果。
回复的内容:
object(stdClass)#1 (6) { ["id"]=> string(38) "chatcmpl-7fVU1gOLjNjh9LHg3uMMqDJBdtu3r" ["object"]=> string(15) "chat.completion" ["created"]=> int(1690126825) ["model"]=> string(18) "gpt-3.5-turbo-0613" ["choices"]=> array(1) { [0]=> object(stdClass)#2 (3) { ["index"]=> int(0) ["message"]=> object(stdClass)#3 (2) { ["role"]=> string(9) "assistant" ["content"]=> string(769) "The OpenAI mission is to ensure that artificial general intelligence (AGI) benefits all of humanity. AGI refers to highly autonomous systems that outperform humans in most economically valuable work. OpenAI aims to build safe and beneficial AGI directly, but if another project that aligns with their values and safety-conscious approach comes close to building AGI before they do, they commit to stop competing and start assisting that project instead. The organization also emphasizes the importance of distributing the benefits of AGI broadly and avoiding uses of AI or AGI that could harm humanity or concentrate power. Ultimately, OpenAI aims to foster a cooperative orientation among research and policy institutions to address the global challenges posed by AGI." } ["finish_reason"]=> string(4) "stop" } } ["usage"]=> object(stdClass)#4 (3) { ["prompt_tokens"]=> int(14) ["completion_tokens"]=> int(140) ["total_tokens"]=> int(154) } }php代码
<?php $ch = curl_init(); curl_setopt($ch, CURLOPT_URL, 'https://fandai.wanglin.blog/v1/chat/completions'); curl_setopt($ch, CURLOPT_RETURNTRANSFER, 1); curl_setopt($ch, CURLOPT_POST, 1); curl_setopt($ch, CURLOPT_POSTFIELDS, "{ \"model\": \"gpt-3.5-turbo\", \"messages\": [{\"role\": \"user\", \"content\": \"What is the OpenAI mission?\"}] }"); $headers = array(); $headers[] = "Authorization: Bearer "."sk-********"; $headers[] = 'Content-Type: application/json'; curl_setopt($ch, CURLOPT_HTTPHEADER, $headers); curl_setopt($ch, CURLOPT_SSL_VERIFYHOST, 0); curl_setopt($ch, CURLOPT_SSL_VERIFYPEER, 0); $result = curl_exec($ch); if (curl_errno($ch)) { echo 'Error:' . curl_error($ch); } curl_close($ch); $result = json_decode($result); var_dump($result); ?>
ChatGPT调整后的代码如下,将0723.php文件中的内容替换为下列代码。
<?php

$ch = curl_init();

curl_setopt($ch, CURLOPT_URL, 'https://fandai.wanglin.blog/v1/chat/completions');
curl_setopt($ch, CURLOPT_RETURNTRANSFER, 1);
curl_setopt($ch, CURLOPT_POST, 1);
curl_setopt($ch, CURLOPT_POSTFIELDS, "{
    \"model\": \"gpt-3.5-turbo\",
    \"messages\": [{\"role\": \"user\", \"content\": \"What is the OpenAI mission?\"}]
}");

$headers = array();
$headers[] = "Authorization: Bearer "."sk-***";
$headers[] = 'Content-Type: application/json';
curl_setopt($ch, CURLOPT_HTTPHEADER, $headers);
curl_setopt($ch, CURLOPT_SSL_VERIFYHOST, 0);
curl_setopt($ch, CURLOPT_SSL_VERIFYPEER, 0);

$result = curl_exec($ch);
if (curl_errno($ch)) {
    echo 'Error:' . curl_error($ch);
}
curl_close($ch);

$result = json_decode($result);
echo $result->choices[0]->message->content;
?>
三、美化页面
现在,生成的内容仅仅只是我们需要的内容啦!
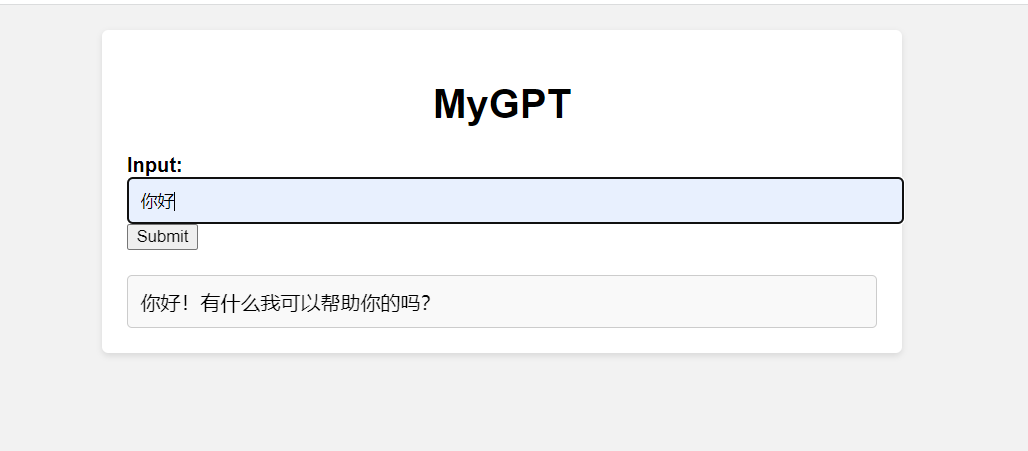
但是,目前的网页略显简陋,我们可以让ChatGPT帮我们写一个输入框和输出框,美化一下页面,然后给网页起一个名字,就叫MyGPT。

<!DOCTYPE html>
<html>
<head>
    <title>MyGPT</title>
    <style>
        body {
            font-family: Arial, sans-serif;
            background-color: #f2f2f2;
            margin: 0;
            padding: 20px;
        }

        .container {
            max-width: 600px;
            margin: 0 auto;
            background-color: #fff;
            padding: 20px;
            border-radius: 5px;
            box-shadow: 0 2px 5px rgba(0, 0, 0, 0.1);
        }

        h1 {
            text-align: center;
        }

        label {
            font-weight: bold;
        }

        input[type="text"],
        textarea {
            width: 100%;
            padding: 10px;
            border: 1px solid #ccc;
            border-radius: 4px;
            resize: vertical;
        }

        .output {
            margin-top: 20px;
            border: 1px solid #ccc;
            padding: 10px;
            background-color: #f9f9f9;
            border-radius: 4px;
        }
    </style>
</head>
<body>
    <div class="container">
        <h1>MyGPT</h1>
        <form method="POST">
            <label for="input">Input:</label>
            <input type="text" id="input" name="input" placeholder="Enter your message" required>
            <button type="submit">Submit</button>
        </form>
        <div class="output">
            <?php
                if ($_SERVER["REQUEST_METHOD"] == "POST") {
                    $input = $_POST["input"];

                    $ch = curl_init();

                    curl_setopt($ch, CURLOPT_URL, 'https://fandai.wanglin.blog/v1/chat/completions');
                    curl_setopt($ch, CURLOPT_RETURNTRANSFER, 1);
                    curl_setopt($ch, CURLOPT_POST, 1);
                    curl_setopt($ch, CURLOPT_POSTFIELDS, "{
                        \"model\": \"gpt-3.5-turbo\",
                        \"messages\": [{\"role\": \"user\", \"content\": \"$input\"}]
                    }");

                    $headers = array();
                    $headers[] = "Authorization: Bearer "."sk-***";
                    $headers[] = 'Content-Type: application/json';
                    curl_setopt($ch, CURLOPT_HTTPHEADER, $headers);
                    curl_setopt($ch, CURLOPT_SSL_VERIFYHOST, 0);
                    curl_setopt($ch, CURLOPT_SSL_VERIFYPEER, 0);

                    $result = curl_exec($ch);
                    if (curl_errno($ch)) {
                        echo 'Error:' . curl_error($ch);
                    }
                    curl_close($ch);

                    $result = json_decode($result);
                    echo $result->choices[0]->message->content;
                }
            ?>
        </div>
    </div>
</body>
</html>
现在,我们就有一个可以交互的ChatGPT界面了!我们还可以调整我们的prompt,让ChatGPT进一步美化界面!
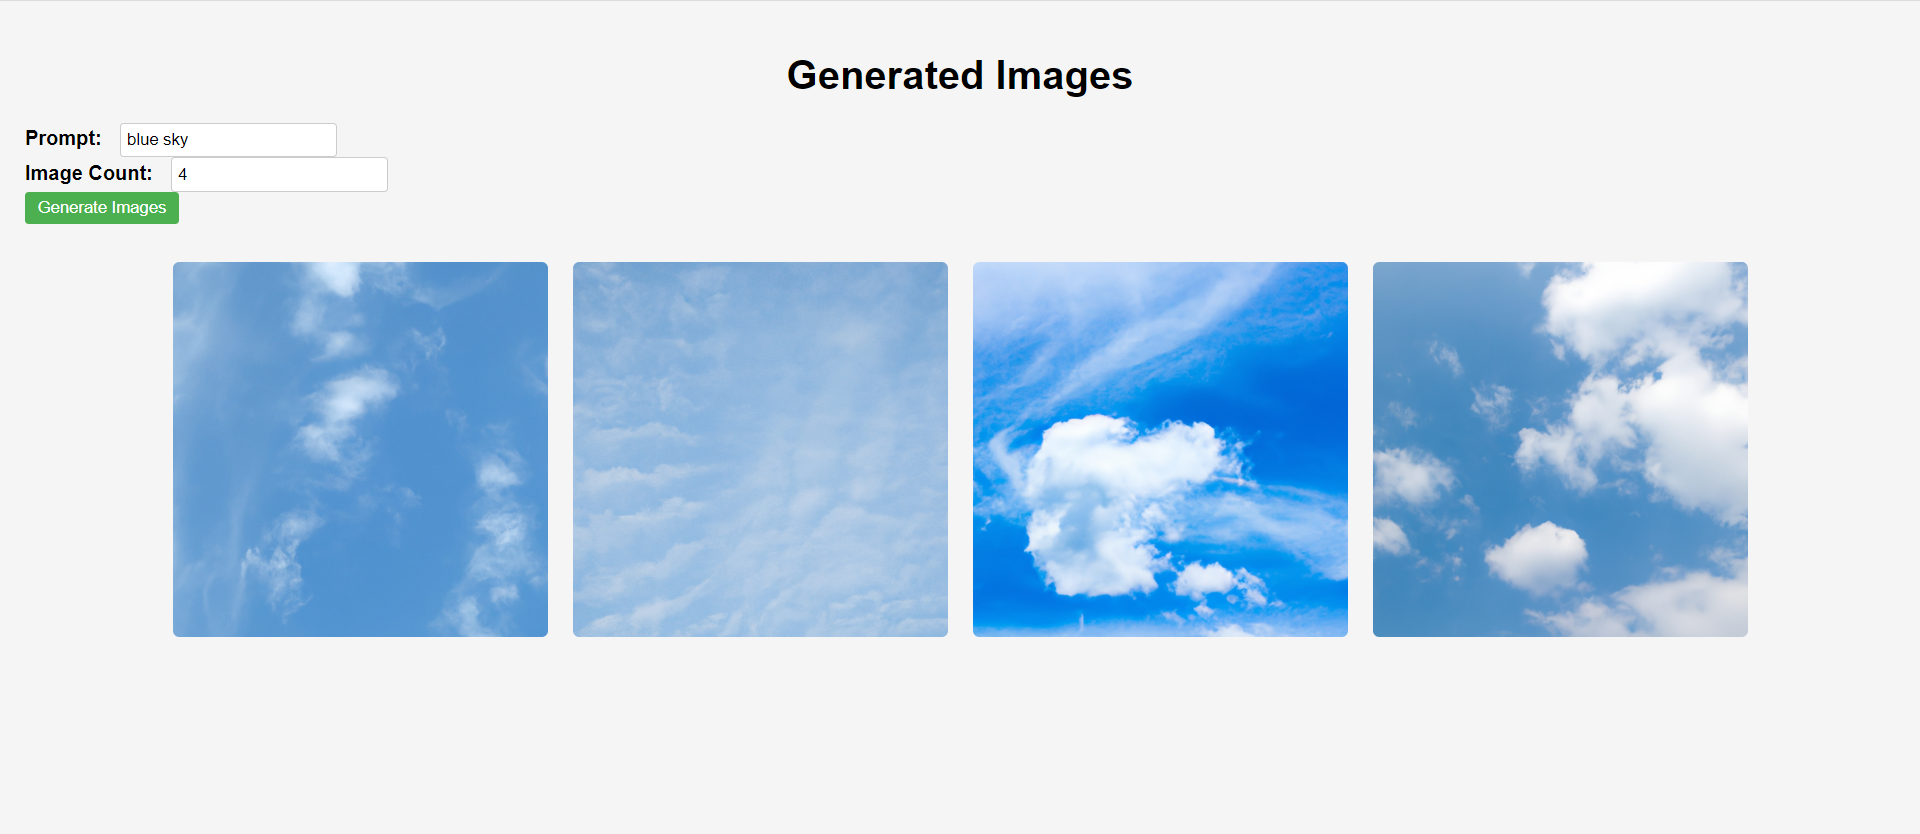
同理,按照这个办法,你还可以调用image的api,效果图分享:
四、主要参考文献
- 40行代码:如何使用PHP开发一个ChatGPT问答网页,https://plaintalks.com/t/topic/1430
- ChatGPT, https://zh.wikipedia.org/wiki/ChatGPT
- ChatGPT:发展历程、原理、技术架构和产业未来!http://www.uml.org.cn/ai/202302164.asp
- OpenAI, https://zh.wikipedia.org/wiki/OpenAI
- OpenAI官方文档,https://platform.openai.com/docs/introduction
- 什么是API, https://www.cloudflare-cn.com/learning/security/api/what-is-an-api/


评论 (0)